Lecture 3: HTML and HTML5 Fundamentals
Every web page you have ever visited is built out of HTML. In this lecture you will learn what HTML actually is, how a page is structured, and how to write the tags that display text, links, images, media, tables, and lists — the raw ingredients of every website.
In This Lecture
- Understand the role of markup languages and why HTML is one
- Learn the standard structure of an HTML document
- Understand elements, tags, attributes, nesting rules, and validation
- Recognize void (self-closing) elements like
<br>and<hr> - Tell block-level elements and inline elements apart, and know why it matters
- Use common HTML attributes, including global and boolean attributes, with real examples
- Write headings, paragraphs, formatted text, and hyperlinks (absolute vs. relative)
- Add images, audio, and video to a page
- Build tables and the three types of lists
- Learn what HTML5 added to the language, and why browser support matters
What Is a Markup Language?
A markup language is a system for adding labels — called tags — to plain text so that a computer program knows how to display or process it. The tags themselves are not part of the content the reader sees; they describe the role of the content around them.
HTML stands for HyperText Markup Language. Let's unpack that name:
- HyperText means text that contains links to other text (or other pages). This is the idea that lets you click a word and jump to a different page — the foundation of the entire web.
- Markup means the text is annotated with tags that describe its structure: "this is a heading," "this is a paragraph," "this is a list."
- Language means there are rules (a grammar) that every browser agrees to follow when reading the tags.
HTML is not a programming language
HTML has no variables, loops, or conditions. It cannot compute anything. It only describes the structure and content of a page — what is a heading, what is a paragraph, what is a link. Later lectures introduce CSS (for appearance) and JavaScript (for behavior and logic).
Every browser (Chrome, Firefox, Edge, Safari) reads your HTML file and builds an internal tree-like representation of it called the DOM (Document Object Model), then draws ("renders") that tree on the screen.

HTML Document Structure
Every valid HTML file follows the same basic skeleton. Save the following as index.html
and open it in any browser to see it work:
<!DOCTYPE html>
<html lang="en">
<head>
    <meta charset="UTF-8">
    <title>My First Page</title>
</head>
<body>
    <h1>Hello, Web!</h1>
    <p>This is my first HTML page.</p>
</body>
</html>
Rendered in a browser, the <head> content is invisible and only the <body> shows:
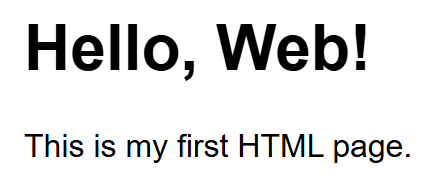
Let's go through each part:
<!DOCTYPE html>— This must be the very first line. It is not a tag in the usual sense; it is a special instruction telling the browser "treat this file as modern HTML5." Without it, older browsers may switch into a compatibility mode called "quirks mode" that renders pages inconsistently.<html>— The root element. Every other tag in the page lives inside this one. Thelang="en"part tells screen readers and search engines the page is written in English.<head>— Contains information about the page that is not displayed directly on the page itself: the page title (shown in the browser tab), character encoding, links to CSS files, and metadata for search engines.<meta charset="UTF-8">— Tells the browser which character encoding to use so that text (including non-English characters) displays correctly.<title>— The text shown in the browser's tab and in search-engine results.<body>— Contains everything the visitor actually sees: headings, paragraphs, images, links, and so on.
Try it now
Copy the example above into a text editor, save it with a .html extension, and
double-click the file. It should open directly in your default browser. This is the
entire "run" process for plain HTML — no installation, no compiler.
Elements, Tags, and Attributes
An element is a complete unit of content, made up of an opening tag, the content, and a closing tag:
<p>is the opening tag.This is a paragraph element.is the content.</p>is the closing tag (notice the forward slash).
Void (Self-Closing) Elements
Some elements have no content and therefore no closing tag at all — you cannot write
<br></br>, because there is nothing to put between an opening and closing <br>. These
are called void elements (also commonly called "self-closing" elements):

Notice the broken-image icon: cat.jpg doesn't actually exist in this example, so the
browser falls back to showing the alt text right where the image would have been — a
preview of why alt matters, covered properly in the Images section below.
| Element | What it does |
|---|---|
<br> |
A single line break within text — forces the following content onto a new line |
<hr> |
A "horizontal rule": a thematic divider line, used to separate sections of content |
<img> |
Embeds an image (covered in detail later in this lecture) |
<input> |
A form control (covered in Lecture 4) |
<meta> |
Document metadata, used inside <head> |
<link> |
Links an external resource such as a CSS file, used inside <head> |
<area>, <base>, <col>, <embed>, <source>, <track>, <wbr> |
Less common void elements you will meet as needed |
<br> vs. <br />
You will see void elements written two ways: <br> (plain HTML5 style) and <br />
(with a trailing slash, inherited from the stricter XHTML standard). Both are valid
HTML5 and render identically — the trailing slash is optional, purely a style choice.
This book uses the plain <br> form.
Don't confuse void elements with elements that are just often empty
<div></div> is not a void element — it is a completely normal element that simply
has no content in this example, and it absolutely does need its closing tag. Void
elements are a fixed, specific list (the ones in the table above); everything else
follows the normal opening-tag/content/closing-tag pattern.
Block-Level vs. Inline Elements
Every HTML element falls into one of two layout categories, which controls how it behaves next to other elements before any CSS is applied at all:
- A block-level element always starts on a new line and stretches to fill the full width available to it, pushing whatever comes after it down to the next line. Think of it as a box stacked on top of other boxes.
- An inline element does not start on a new line — it flows within the surrounding text, taking up only as much width as its content needs, like a word in the middle of a sentence.
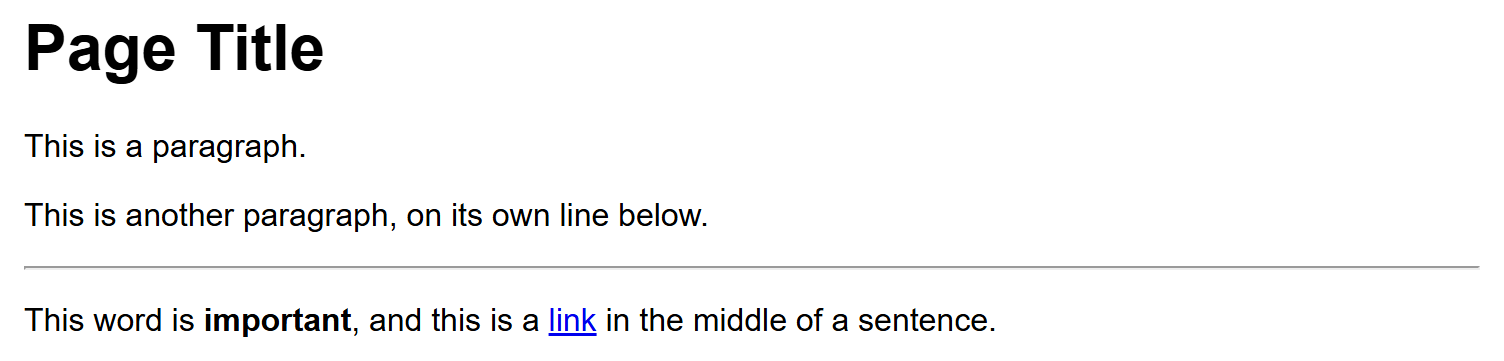
<!-- p and h1 are block-level: each starts on its own line -->
<h1>Page Title</h1>
<p>This is a paragraph.</p>
<p>This is another paragraph, on its own line below.</p>

<!-- strong and a are inline: they sit inside the flow of the sentence -->
<p>This word is <strong>important</strong>, and this is a <a href="#">link</a> in the middle of a sentence.</p>
Here's the same code, rendered in a browser — notice the heading and both paragraphs each
claim a full line, while <strong> and <a> sit inside the last paragraph's line:
| Block-level | Inline | |
|---|---|---|
| Starts on a new line? | Yes | No — flows with surrounding content |
| Takes full available width? | Yes, by default | No — only as wide as its content |
| Can contain other block elements? | Usually yes | No — only other inline elements or text |
| Examples | <h1>-<h6>, <p>, <div>, <ul>, <ol>, <li>, <table>, <form>, <section> |
<a>, <strong>, <em>, <span>, <img>, <br>, <input>, <label> |
You already know several of each
Every heading and paragraph tag you've used so far in this lecture is block-level;
<a>, <strong>, and <em> from the formatting table below are inline. <div>
(a generic block container) and <span> (a generic inline container) — the two most
common "no inherent meaning, just a box" elements — are covered in the next lecture
alongside semantic HTML. CSS can override this default behavior (with the display
property, in Lecture 6), but the default block/inline behavior is what you get with no
CSS at all.
Attributes
An attribute provides extra information about an element, without being part of the
content the reader sees. Attributes are written inside the opening tag only, as
name="value" pairs, separated by spaces:
Here, <a> is the element (a hyperlink), href is an attribute specifying the destination
URL, and target="_blank" is an attribute telling the browser to open the link in a new
tab. Attribute values should always be wrapped in quotes (double quotes are the
convention this book uses).
Some frequently used attributes work the same way on almost any element — these are called global attributes:
| Attribute | Purpose | Example |
|---|---|---|
id |
A unique identifier for one specific element on the page (no two elements should share an id) |
<h2 id="contact">Contact</h2> |
class |
One or more category names, shared by many elements, used by CSS and JavaScript to target them as a group | <p class="warning-text">Careful!</p> |
title |
Extra information shown as a tooltip on hover | <abbr title="World Wide Web Consortium">W3C</abbr> |
style |
Inline CSS applied to just this one element (covered properly in the CSS lectures) | <p style="color: red;">Urgent</p> |
lang |
The (human) language of this element's content | <p lang="fr">Bonjour</p> |
data-* |
A custom attribute for attaching your own data, read later by JavaScript (an HTML5 addition — see later in this lecture) | <li data-user-id="42">Ali Khan</li> |
Other attributes are specific to one element — href and target only make sense on
<a>; src and alt only make sense on <img>; you'll meet each as you meet the
element it belongs to.
Not every attribute takes a value. A boolean attribute is either present (meaning
"true") or absent (meaning "false") — it does not need ="value" at all:
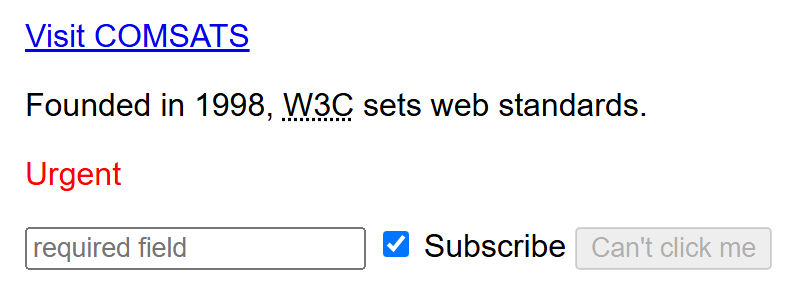
<input type="text" required>
<input type="checkbox" checked>
<button disabled>Can't click me</button>
Here is everything from this section rendered together — the link, an <abbr> using
title (hover it in a real browser to see the tooltip), a style-colored paragraph, and
the three boolean-attribute form controls (notice the pre-checked checkbox and the
grayed-out disabled button):
Writing required="required" is also valid HTML5 (some developers do this for clarity in
JSX/React code, which you'll meet later in this course), but the bare required form
shown above is what you'll see most often in plain HTML.
An element can have as many attributes as it needs, in any order, separated by spaces:
Nesting Rules
Elements can be placed inside other elements — this is called nesting. When you nest elements, the inner element must close before the outer one closes, like nested boxes:
<!-- Correct nesting -->
<p>This is <strong>very important</strong> text.</p>

<!-- WRONG: tags overlap incorrectly -->
<p>This is <strong>very important</p></strong>
Overlapping tags break the page
Browsers try their best to recover from broken HTML, but the result is unpredictable. Always close tags in the reverse order you opened them: last opened, first closed.
Document Validation
Because browsers are forgiving, it is easy to write HTML with small mistakes (a missing closing tag, a misspelled attribute) and still see something on screen — but the result might look wrong in a different browser. Validating your HTML means checking it against the official HTML rules using a tool such as the W3C Markup Validation Service. Validating your pages, especially early on, helps you catch mistakes before they cause confusing bugs.
Headings, Paragraphs, and Text Formatting
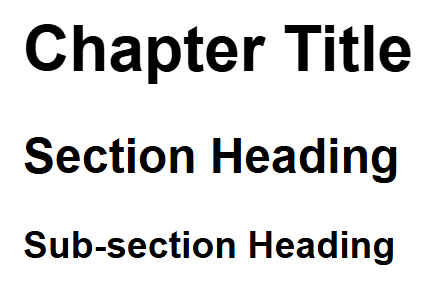
HTML provides six levels of headings, <h1> through <h6>, from most to least important:
Only one <h1> per page
Use <h1> for the main title of the page, and step down through <h2>, <h3>, and so
on for sub-headings. Skipping levels (going from <h1> straight to <h4>) or using
multiple <h1> tags confuses screen readers and hurts search-engine ranking.
Regular text goes inside a paragraph element:
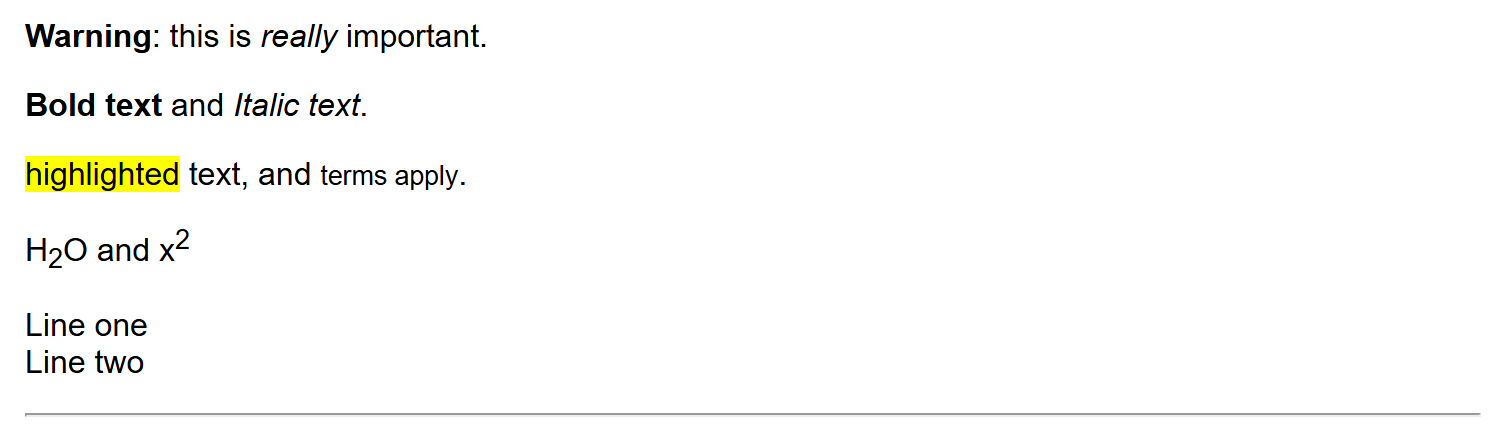
Common text-formatting elements:
| Tag | Meaning | Example |
|---|---|---|
<strong> |
Important text (bold) | <strong>Warning</strong> |
<em> |
Emphasized text (italic) | <em>really</em> |
<b> |
Bold, no extra importance | <b>Bold text</b> |
<i> |
Italic, no extra importance | <i>Italic text</i> |
<mark> |
Highlighted text | <mark>highlighted</mark> |
<small> |
Smaller/fine print | <small>terms apply</small> |
<sub> / <sup> |
Subscript / superscript | H<sub>2</sub>O, x<sup>2</sup> |
<br> |
Line break | Line one<br>Line two |
<hr> |
Horizontal rule (divider line) | <hr> |
All of these rendered together:
Hyperlinks: Absolute vs. Relative URLs
A hyperlink (or just "link") lets a user click text or an image to navigate to another
page. Links are created with the <a> (anchor) element and its href (hypertext
reference) attribute:
There are two kinds of URLs you can put in href:
- Absolute URL — the complete address, including the protocol (
https://) and domain name. Use this to link to a page on a different website.
- Relative URL — a path relative to the current page's location, used to link to another page within your own site. It does not include the domain name.
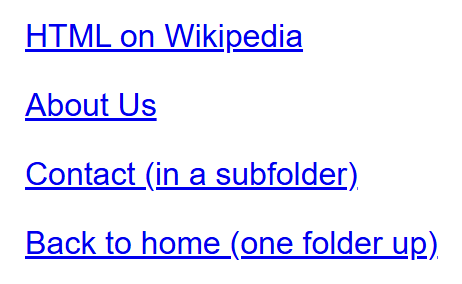
<a href="about.html">About Us</a>
<a href="pages/contact.html">Contact (in a subfolder)</a>
<a href="../index.html">Back to home (one folder up)</a>
All four links rendered together (an absolute link followed by three relative ones):
When to use which
Use absolute URLs for links leaving your site, and relative URLs for links that stay within your own site. Relative URLs have a big advantage: if you move your entire website to a new domain, none of your internal links break.
You can also link to a specific spot on the same page using an id and a # fragment:
Images
The <img> element embeds an image. It is a void element (no closing tag) and requires two
key attributes:

src(source) — the path to the image file, which can be relative or absolute, just like a link'shref.alt(alternative text) — a text description of the image, shown if the image fails to load and read aloud by screen readers for visually impaired users. Never skipalt.widthandheight— optional, but recommended, so the browser can reserve space for the image before it finishes loading (this prevents the page from jumping around).
Audio and Video
HTML5 introduced native elements for playing media, without needing any external plugin (older sites relied on Flash for this, which no longer works in modern browsers):
<audio controls>
    <source src="song.mp3" type="audio/mpeg">
    Your browser does not support the audio element.
</audio>

<video width="480" controls>
    <source src="movie.mp4" type="video/mp4">
    Your browser does not support the video element.
</video>
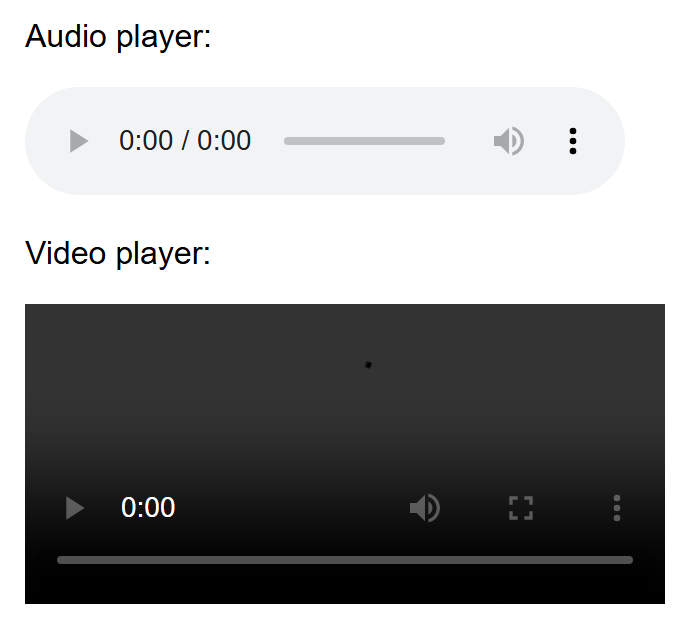
Even without a real, playable file behind song.mp3/movie.mp4, the browser still draws
its native player controls, because controls is a boolean attribute that only depends on
being present — not on whether a file actually loads:
- The
controlsattribute makes the browser show a built-in play/pause/volume bar. - The
<source>child element specifies the actual file; you can list several<source>tags with different formats so the browser picks the one it supports. - The plain text inside the tags ("Your browser does not support...") is a fallback,
shown only in very old browsers that don't recognize
<audio>/<video>at all.
Tables
A table is built out of rows and cells using <table>, <tr> (table row), <th> (table
header cell), and <td> (table data cell):
<table>
    <thead>
        <tr>
            <th>Name</th>
            <th>Course</th>
            <th>Grade</th>
        </tr>
    </thead>
    <tbody>
        <tr>
            <td>Ali</td>
            <td>CSC336</td>
            <td>A</td>
        </tr>
        <tr>
            <td>Sara</td>
            <td>CSC336</td>
            <td>A+</td>
        </tr>
    </tbody>
</table>
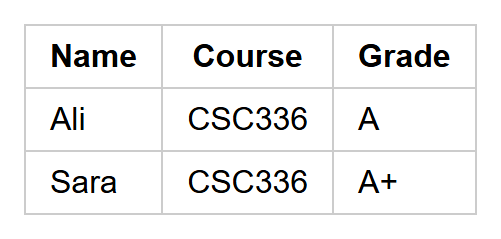
Note
Plain HTML tables have no visible gridlines by default — the borders in the screenshot above were added with a little CSS purely so the structure is easy to see. You will learn to style tables (and everything else) with CSS starting in the next unit.
<thead>groups the header row(s);<tbody>groups the actual data rows. Both are optional but recommended for clarity and styling.<th>cells are for column/row labels and are bold and centered by default.<td>cells hold the actual data.
Tables are for tabular data, not page layout
In the early days of the web, designers used tables to arrange entire page layouts (menus, sidebars, columns). This is now considered bad practice because it confuses screen readers and mixes structure with appearance. Use tables only for genuinely tabular data (spreadsheet-like information); use CSS for page layout, as you'll learn in later lectures.
Lists
HTML has three kinds of lists:
Unordered list — a bulleted list, for items with no particular sequence:
Ordered list — a numbered list, for items where order matters:
Description list — pairs of terms and their descriptions (useful for glossaries or key-value data):
<dl>
    <dt>HTML</dt>
    <dd>The markup language used to structure web pages.</dd>
    <dt>CSS</dt>
    <dd>The language used to style web pages.</dd>
</dl>
All three list types rendered together — unordered, then ordered, then description:
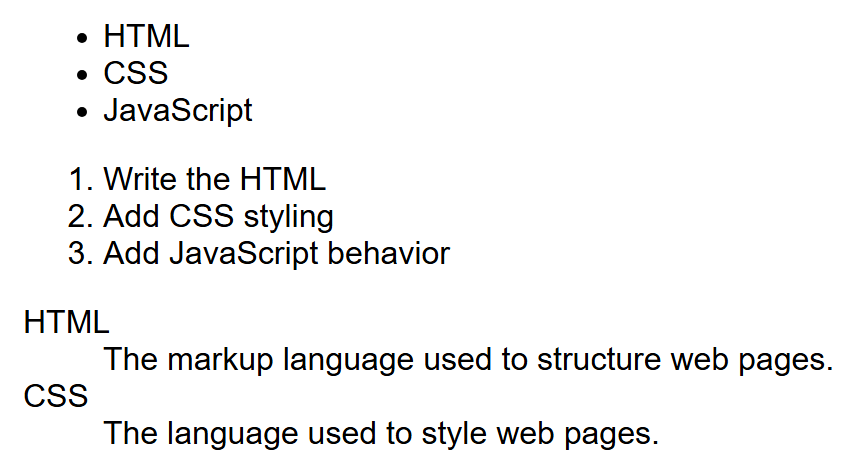
<dl>— description list (the container)<dt>— description term (the word being defined)<dd>— description details (the definition itself)
Lists can also be nested: put a whole <ul> or <ol> inside an <li> to create
sub-lists.
HTML5: What Changed and Why It Matters
HTML5 is the current version of the HTML standard, published in 2014 and continuously
updated since. Before HTML5, developers often relied on generic <div> tags with class
names like class="header" or class="footer" to organize pages, and browser plugins
(like Flash) to play audio and video. HTML5 fixed both problems.
New elements introduced in HTML5 include:
- Semantic layout elements:
<header>,<nav>,<main>,<section>,<article>,<aside>,<footer>(covered in detail in the next lecture) - Media elements:
<audio>,<video>,<source>,<track> - Graphics:
<canvas>(for drawing with JavaScript) and native<svg>support - Form improvements:
<datalist>,<output>, and many new<input>types (covered in Lecture 4) <figure>and<figcaption>for images with captions
New attributes introduced in HTML5 include:
placeholder,required,pattern,autofocuson form inputsdata-*— custom "data attributes" that let you attach your own data to any element, which JavaScript can later read:
contenteditable— makes any element directly editable by the user in the browserdraggable— makes an element draggable with the mouse
Browser Support Considerations
Not every browser (and not every version of a browser) supports every HTML5 feature. Before you rely on a newer feature in a real project, it is good practice to check caniuse.com, a free website that shows exactly which browsers and versions support a given feature.
Progressive enhancement
A common strategy is to design your page so it still works reasonably well in older
browsers, and only enhances the experience for browsers that support the newer
feature — for example, the fallback text inside <video> you saw earlier. This
strategy is called progressive enhancement.
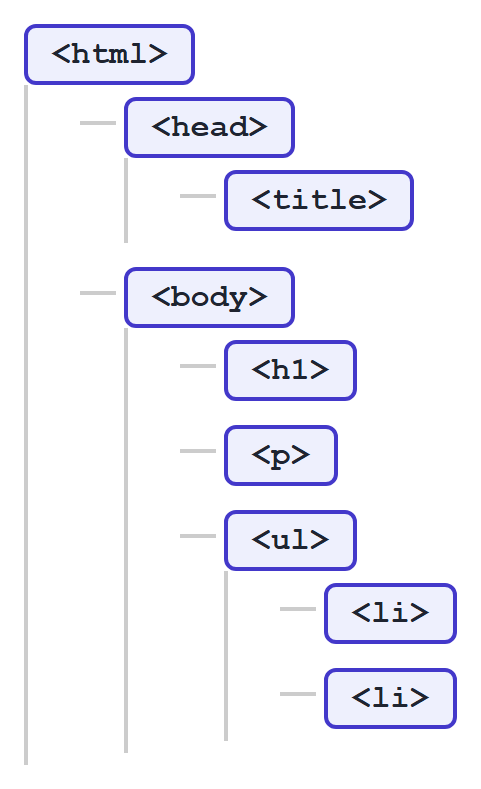
The Document Tree
Because HTML elements nest inside each other, an HTML document naturally forms a tree structure. This is exactly what the browser's DOM represents:
Try It Yourself
- Create a file called
profile.html. Give it a proper<!DOCTYPE html>,<html>,<head>(with a<title>), and<body>. Inside the body, add an<h1>with your name, a paragraph describing yourself, an image of anything (with a properaltattribute), and an unordered list of three of your hobbies. - Add a small table listing three courses you are taking this semester, their course
codes, and your expected grade. Then add a relative link at the bottom of the page that
points to a second file called
contact.html(it doesn't need to exist yet — just write the link).
Key Takeaways
- HTML is a markup language: it describes structure and content, not appearance or logic.
- Every HTML document starts with
<!DOCTYPE html>and has<html>,<head>, and<body>. - Elements are made of opening/closing tags; attributes add extra information inside the opening tag; tags must be nested (closed) in the correct order.
- Void elements (
<br>,<hr>,<img>,<input>, and a handful of others) have no closing tag because they have no content. - Block-level elements stack on their own line and fill the available width by default; inline elements flow within surrounding text and take only the width they need.
- Attributes can be global (usable on almost any element, like
id/class/title), element-specific (likehrefon<a>), or boolean (present or absent, likerequired, with no="value"needed). - Absolute URLs point to other websites; relative URLs point within your own site and survive a domain move.
<img>,<audio>, and<video>embed media directly, without needing plugins.- Tables (
<table>,<tr>,<th>,<td>) are for tabular data only, not page layout. - HTML has three list types: unordered (
<ul>), ordered (<ol>), and description (<dl>). - HTML5 added semantic elements, native media support, and new attributes like
data-*; always check browser support for newer features before relying on them.